
Agriculture and Horticulture
Starlink Mounting for Agriculture and Horticulture Fleets
The Problem
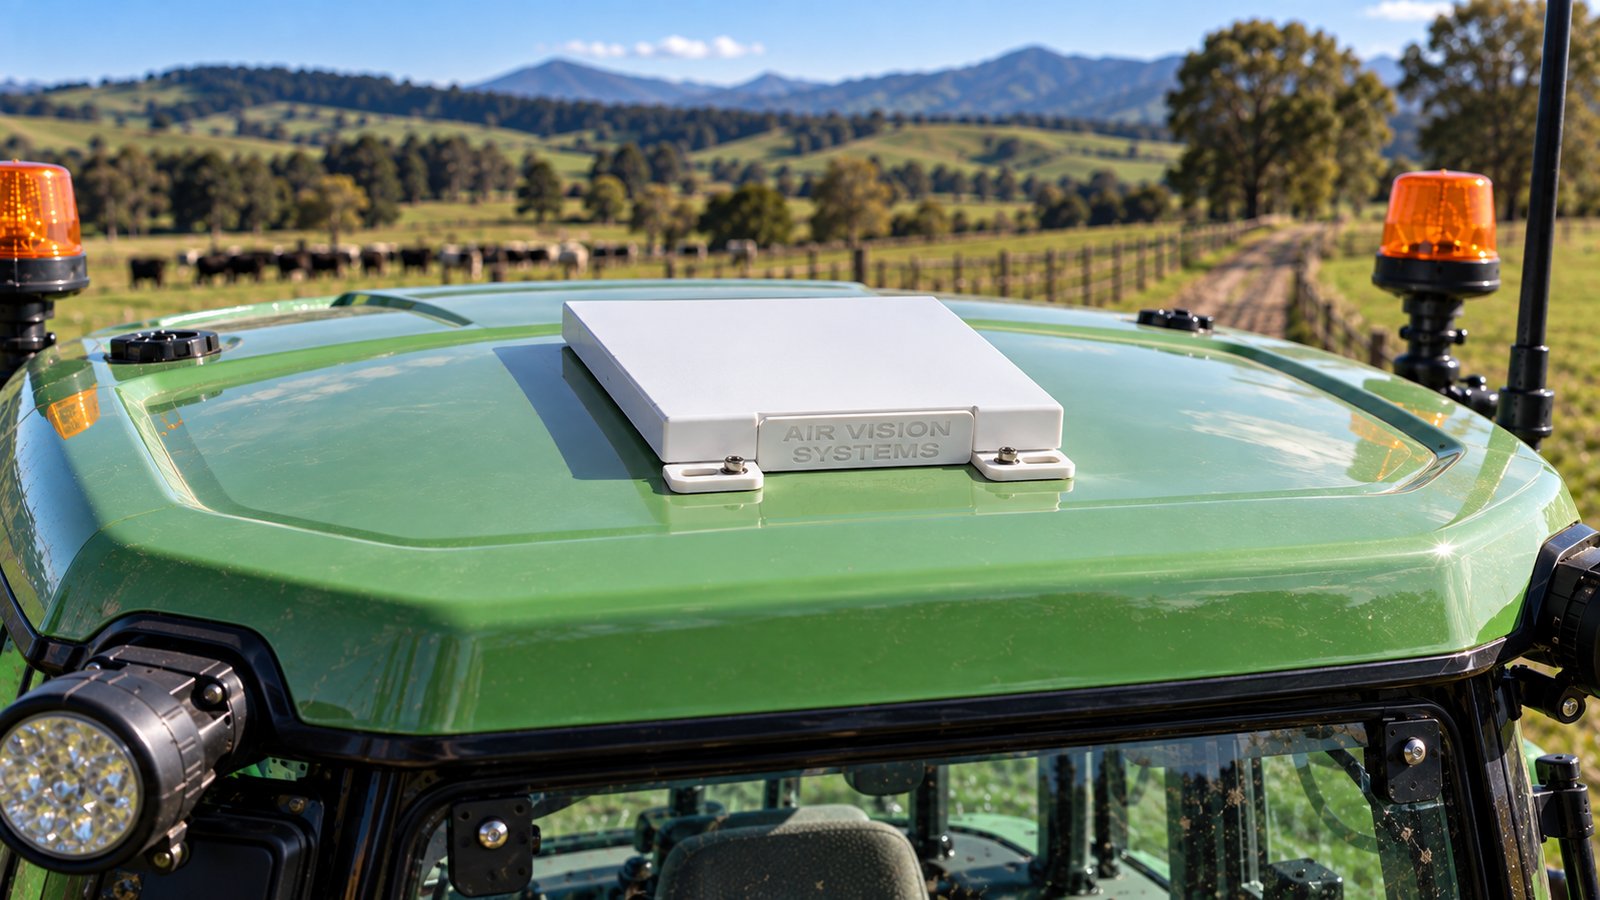
A farm vehicle rarely stays where the cell tower can see it. Spray rigs, harvesters and side-by-sides spend their working hours in the back paddock, the shelter belt or the far side of a hill block, exactly where coverage drops out first. For an operation running precision agriculture software, remote monitoring, or simply needing a driver to raise the alarm from the back of the property, that gap is not an inconvenience. It is the difference between a job getting done and a vehicle sitting idle while someone drives back into range.
New Zealand farm and orchard land is large, uneven and often shielded by the very terrain that makes it good growing country. Hills, shelter belts and valleys that protect crops and stock also block the line of sight to a cell tower. A vehicle-mounted satellite terminal solves the problem at the source, moving with the vehicle rather than depending on where the nearest tower happens to sit.
The vehicles involved are not delicate. Tractors, harvesters, spray rigs and utes work in dust, vibration, mud and long hours of UV, often for a decade or more. A mount built for a weekend car trip will not last a season of that. This is a fleet application, and the mounting hardware needs to be treated accordingly.
Recommended Configuration
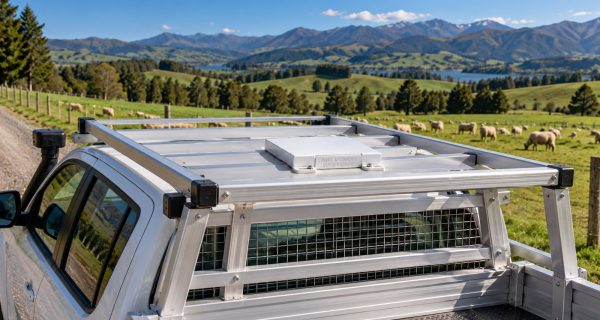
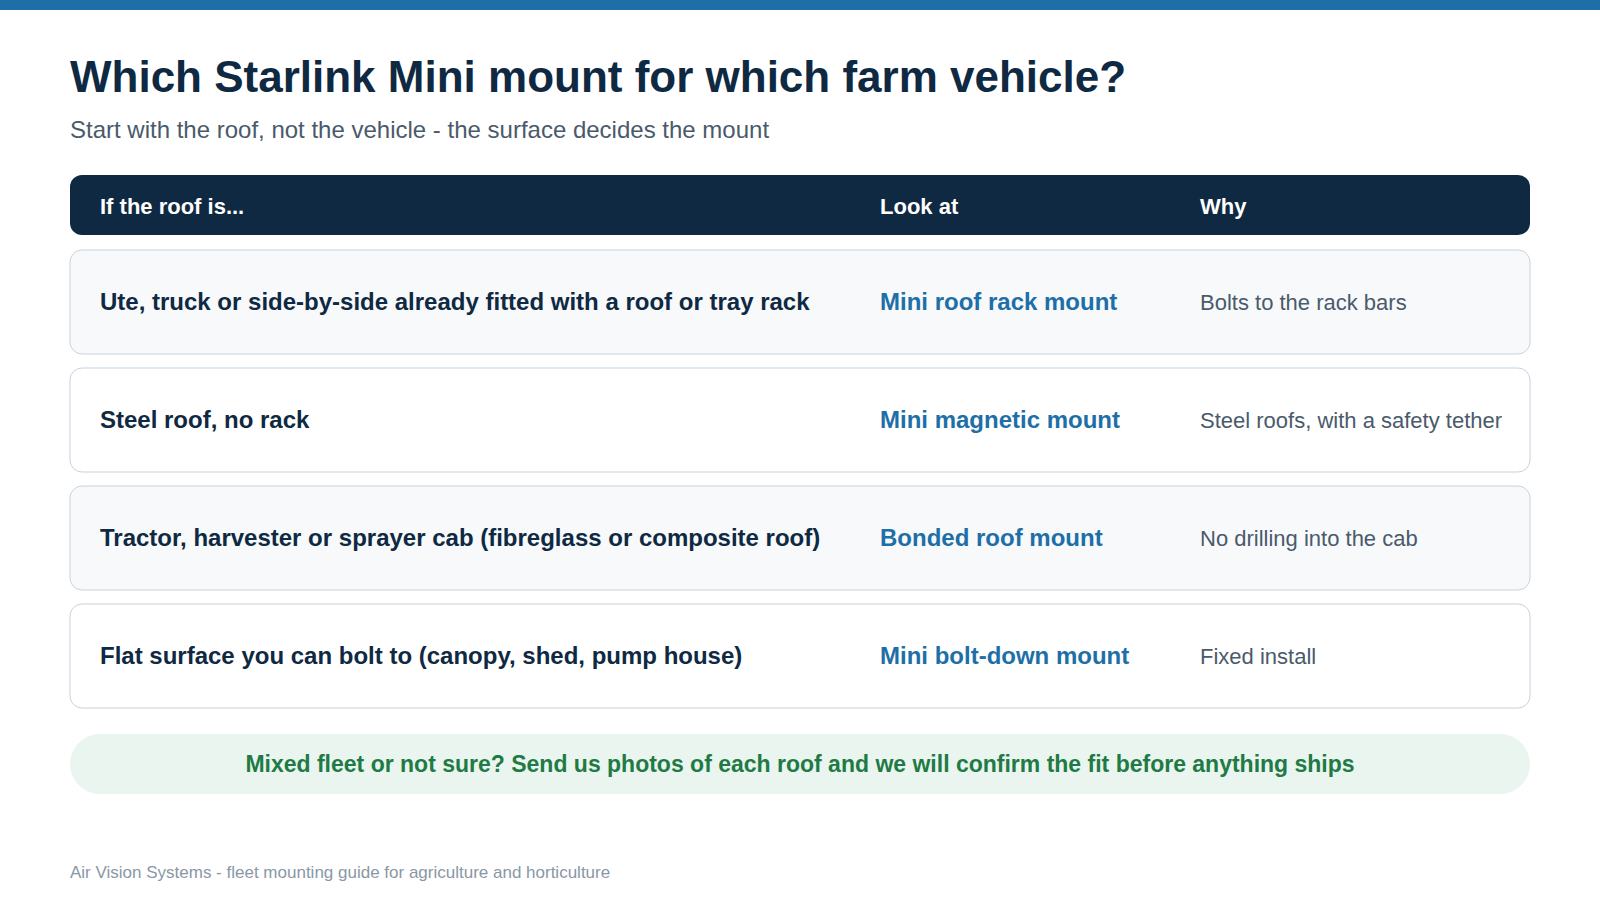
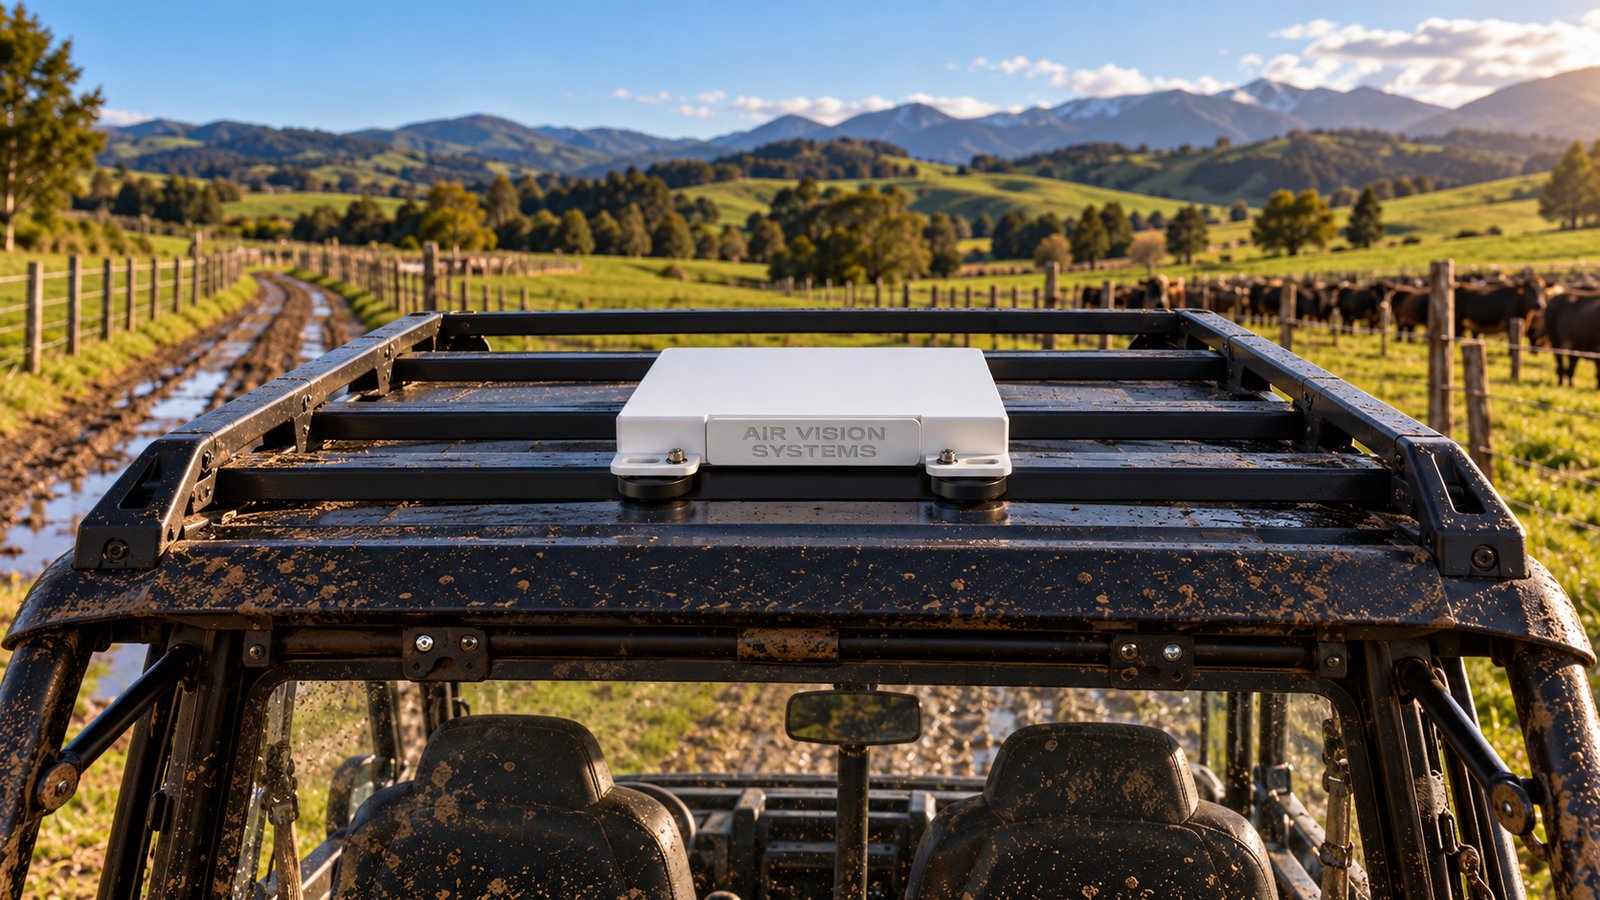
Ute, truck or side-by-side already fitted with a roof rack or tray rack
Bolts to the existing rack bars with stainless T-bolts, in a two-rail or single-rail layout. Most tractors and many farm utes have no rack; use one of the options below instead.
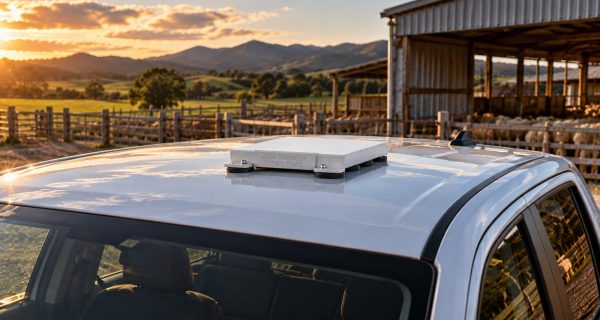
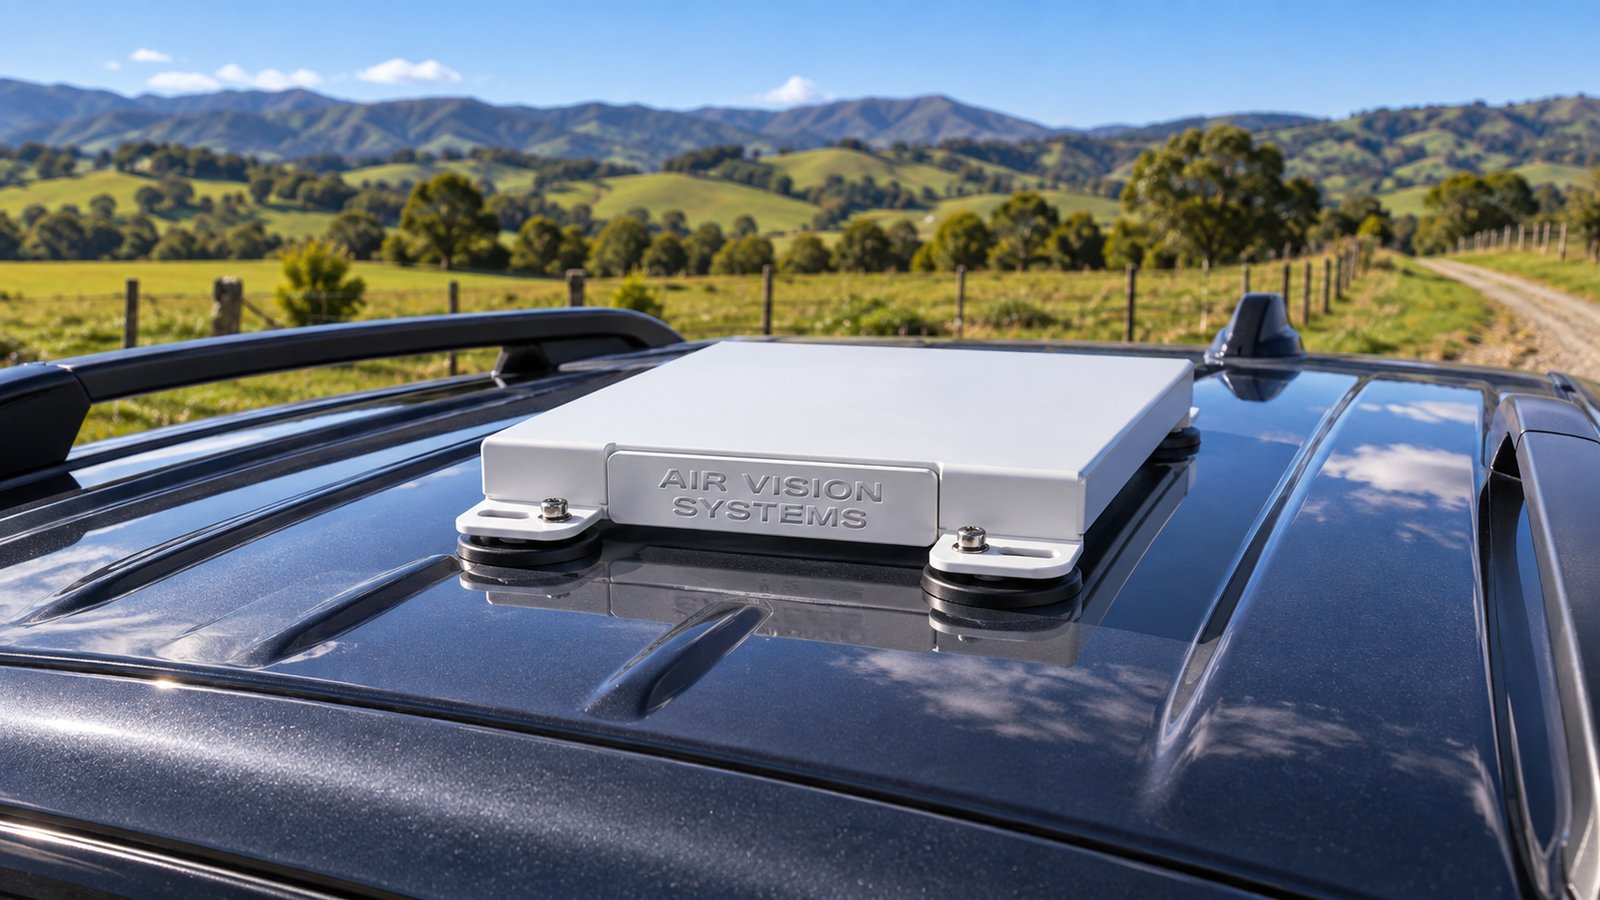
Steel-roofed ute or truck, no rack
Use with eight or four 88 mm magnets, plus a safety tether. Steel roofs only. Not for aluminium, fibreglass or glass roofs.
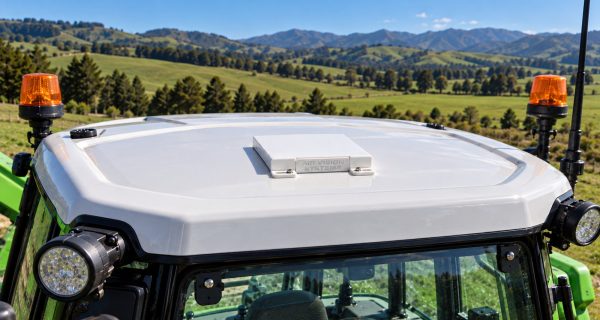
Tractor, harvester or sprayer cab with a fibreglass or composite roof
Bonds to the roof, so there is no drilling into the cab.
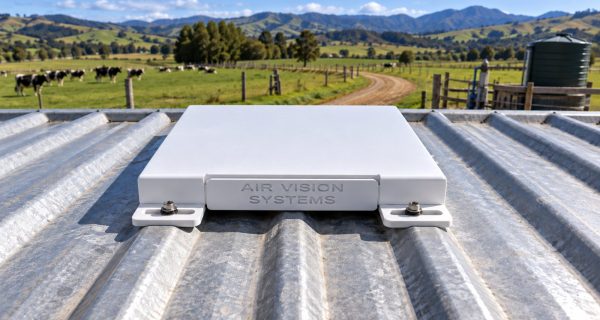
Canopy, shed, pump house or other flat surface
Fixed installation for sites that do not move.
Orchards, vineyards and hail-prone areas (any of the above)
Adds a hail cover over the dish.
Power: the Starlink Mini runs from 12 to 48 V DC, so it can be powered from the vehicle itself. We supply the 12 V power cables and step-up converters to suit, and confirm the right setup for each vehicle at quote stage.
Technical Specification
| Item | Figure | Basis |
|---|---|---|
| Starlink Mini dish | IP67 Type 4 (with cables installed), operating range -30 to 50°C, 1.10 kg | Starlink specification sheet |
| Roof rack mount, two-rail | Wind of 252 km/h from five directions. Highest stress in the aluminium plate 16.2 MPa against a yield strength of 193 MPa: a safety factor of 11.9, and above 9 with an extra 25% allowance for gusts | Computer simulation (airflow and structural) |
| Bonded roof mount | Modelled on both steel and fibreglass roof panels. The bond stayed fully attached in every wind direction modelled | Computer simulation (airflow and structural) |
| Starlink Mini bolt-down mount | Wind of 252 km/h, the threshold of a Category 5 hurricane, with the mount bolted to timber, steel and concrete bases | Computer simulation (airflow and structural) |
| Outdoor protective cover (hail) | A 30 mm hailstone at 30 m/s: peak stress about a fifth of the material's yield strength (safety factor about 4.8), no permanent deformation, and the cover stayed in place | Computer simulation (impact) |
| Materials | Marine-grade 5052 aluminium plates and brackets; 316 stainless steel T-bolts on the roof rack mount | AVS design specification |
Mount figures come from computer simulation under defined test conditions. They support the design and are not a substitute for vehicle-specific certification. See our engineering reports.
Installation Notes
01.
Roof rack mount. Only for vehicles that already have a roof rack or tray rack. It bolts to the existing bars. Use our Roof Rack Fit Finder to check your bars.
02.
Magnetic mount. Place it on clean, flat, dry steel. Magnets will not hold on aluminium, fibreglass or glass. Always fit a safety tether.
03.
Bonded roof mount. Surface preparation matters. Clean the roof as instructed and let the bond cure fully before the vehicle is driven.
04.
Cabling. Route the cable clear of moving parts, PTO shafts, and anything that gets hot, and secure it along the run rather than leaving it to hang. Cable length and the vehicle’s 12 V supply both affect the setup; see how far you can run a Starlink Mini cable in a vehicle.
Compliance Statement
Air Vision Systems is a New Zealand-owned company and an approved supplier to New Zealand Police. Our mounts are designed in-house and assessed by computer simulation under defined test conditions. These assessments support the design; they are not a substitute for vehicle-specific or regulatory certification.
Fitted equipment must be securely attached and must not block the driver’s view, lights or beacons. Your fleet or health and safety manager should confirm each installation meets your own vehicle and site policies. Starlink supports the Mini in motion on eligible plans, where permitted (Starlink Help Center).
Get a Fleet Quote
Fast Response From Our NZ Team.
FAQs
Common Questions
Will this fit on a tractor cab with an existing beacon bar or roof rack?
Do we need a roof rack?
Our tractor has a fibreglass cab roof. Which mount should we use?
Does the mount need to come off between seasons?
Can Starlink work while the vehicle is moving?
Can one order cover a mixed fleet?
What happens when a vehicle is replaced?
We grow in a hail-prone area. Is there protection for the dish?
Yes. The Starlink Mini outdoor protective cover adds a hail cover over the dish. See our hail protection article for the details.